Tuesday, February 28, 2012

Cinnamon Filled Pastry Made Simple

Pastry. It can be a scary word for one with a small and limited kitchen, but it isn't always scary. This recipe is simple and partially store bought (I don't like using store bought things a lot, but this stuff is good). As a side note, you can use these puff pastry sheets for savory dishes as well as deserts.

need: cookie sheet, knife, fork, spoon, flat spatula, whisk, measuring spoon, 2 small bowls

Cinnamon-Sugar Filled Pastry with Glaze

1 box Pepperidge Farm Puff Pastry Sheets (1 box has 2 sheets)
3 T. cinnamon
6 T. granulated sugar
4 T. and some extra butter

Follow the instructions on the package to let the sheets defrost; either 40 minutes at room temperature or overnight in the fridge. In the meantime, make the filling and preheat the oven to 375 degrees. Melt the butter and whisk sugar and cinnamon into a thick coarse mixture. If you don’t have a whisk, use a fork.

Once the sheets are defrosted, completely separate the 3 sections. Since I'm at the dorms and don’t have a clean table, I'm going to use my extra pan. Following the preset lines, cut the square into 9 smaller squares. Do this for the other sheet. Take a small square and lightly use the palm of your hand to flatten it out. Adjust the square so it looks like a diamond (<>) and have the stickier side up.

Then take about a 3/4 teaspoon full of filling and dump it in the middle of the square. Lightly butter the bottom edges and take the top corner and fold it over the filling to place on top of the bottom corner but allow some of the bottom layer to show (basically not a perfect match). Use a fork to crimp the edges, press down hard enough to squish the top layer into the bottom layer but not enough to cut through.

To allow the pastries to come off the pan easier, rub some butter on the cookie sheet or use a nonstick cookie sheet pan. Place the triangles so they aren't touching; I suggest 4 or so triangles. Bake for 15-20 minutes or golden brown. They won't get that much wider but should puff up and the filling seep out of the edge. Watch out for burning or smoke from the filling that has seeped onto the pan. When you take out the pan, quickly take a damp paper towel to the filling by tapping the pastry away and swiping up the mess. Be careful with how you fold the paper towel as the filling is hot; I burned myself on the filling alone (ouch).

Be creative by twisting the corners up. Take the pastries off the pan onto a wire rack or a container for storage. By sliding the triangles flat side to flat side, it is easier to drizzle and not waste icing. The pastries are good as desert or as breakfast as they are similar to the ingredients in cinnamon rolls.

Icing


3/4 powdered sugar
1/2 tsp. vanilla
1 T. water


Whisk together all ingredients until thick but thin enough to drizzle. If too thin add more powdered sugar, a little at a time. If too thick to drizzle, add a small amount of water at a time. A little bit of water goes a long way.
Cinnamon-Sugar Filled Pastries

Monday, February 27, 2012

Billy Vanilly

My favorite is the cookies and cream cupcake
If you love cupcakes and don't have enough time to bake them, go to Billy Vanilly. They also do cakes and themed events such as birthdays and weddings.


Billy Vanilly has been covered by many local news channels and one of the bakers has been on Food Network's Cupcake Wars.


Their website is http://www.billyvanillycupcakes.com/


Billy Vanilly is located SW Huntoon in Topeka.
View Larger Map

Sunday, February 26, 2012

Whipping Cream by Hand Video


In my post on 'cupcakes' you have to whip the frosting and without a mixer that can be very hard. This video by Cooking with Candra from YouTube helps describe the process. The video is long, but well detailed.

Side notes about the video/author: Candra is from Canada and uses the metric system and 500 mL of whipping cream is a little more than one pint. Using a metal bowl is best, but if you don't have a metal bowl, use a glass bowl over a plastic one. The main thing is for it to be cold. When she says "icing sugar" that is confectioners' or powdered sugar.

Something I did not know that I learned from this video was that hand-mixed whipped cream holds form better than machine-mixed whipped cream.

As a hint for my next baking post, it involves cinnamon sugar.

Until I bake next, I'm Sarah
Peace

Monday, February 13, 2012

Guest Kitchen: Lemon Bars

My sister's kitchen
Even though this will only be the second food post, it's time for the guest kitchen! As previously mentioned as a possibility, I asked my sister nicely enough and she has opened her kitchen and supplies to me. :D


Since I don't have a few other small ingredients, a food processor, a 9x9 square pan, or a saucepan, I'm going to take this opportunity to make lemon squares. In a future food post I will try to figure out a way to make thicker brownies without having a 9x9 pan (hopefully there's a way...) I'm still trying to think of ways around the saucepan but using my baking sheet on an electric stove top just doesn't sounds safe...and remember: safety first!


Beware, these lemon bars are very sour and lemony. My sister and I loved them, but if you want a calmer bar, don't add as much lemon and add a touch more heavy cream.

Zesty Lemon Bars

Prep time: about 20 min.   Cook time: 30-40 minutes (depending on pan)
Cool time: 2 hours

Utensils: tinfoil, food processor, spatula, whisk, knife, butter knife, cutting board, grater, strainer, large bowl, medium saucepan, baking dish
1 ¼ cups all-purpose flour                   2 eggs
½ cup confectioners’ sugar                  1 cup & 2 T. granulated sugar
½ t. salt                                                        2/3 cup fresh lemon juice
12 T. unsalted butter (1 ½ sticks)      ¼ (about) grated lemon zest
cut into 12 pieces and softened          3 T. heavy cream
7 egg yolks                                            

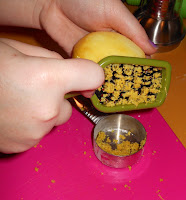
Using a grater to zest lemon
First zest and juice the lemons, about 6 small lemons or 4 large. Use a grater with small holes and grate on as much surface of the lemon as possible, grate until the rind is almost white to get as much as you can. We almost got ¼ a cup of zest from 6 small lemons. Then cut the lemons in half and squeeze into a measuring cup. If a few seeds get it its ok, there’s a straining process towards the end.


Set the oven to 350 degrees. Line a 9x9 or 8x8 pan with foil and spray lightly with vegetable oil or rub with butter. (For reference, we used an 8x8 pan)

Cut pieces of butter

In a food processor, combine the flour, confectioners’ sugar, and salt; about 5 seconds. Place 8 cut pieces (8 T.) of butter spread out on top and pulse until mixture is coarse but combined; about 8-10 pulses. Some butter won’t have mixed in completely.
Dump the mixture into pan, spread out, and press firmly into an even layer using fingers. Don’t create a side layer, it is only a bottom layer. Bake until the crust begins to brown at the edges; about 20 minutes.

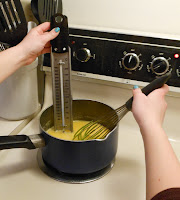
Separate the yolks from the white with either a separator (above left image) or by sloshing the yolk from one cracked shell to the other (above right image). Place the 2 eggs and the 7 yolks into a medium nonstick saucepan. Whisk together and then whisk in the granulated sugar until combined. While whisking, add the lemon juice, lemon zest, and a pinch of salt. Add the remaining 4 T. of butter and cook over medium-low heat, stirring constantly.

If you have a candy thermometer or a cooking thermometer of any kind, stir and watch the temperature to get to 170 degrees. If you don’t have a thermometer, stir for about 5 minutes. The mixture will thicken and become a corn syrup consistency.
By placing a strainer over a large bowl, immediately pour the mixture through the strainer. Press on the leftovers within the strainer lightly and scrape the bottom of the strainer. Using a spatula, stir in the heavy cream.
By now the crust should have been done and resting; pour the lemon mixture into the still warm crust. Bake until the filling is shiny, the edges begin to become opaque, and the center jiggles slightly when shaken; the edges will slightly sizzle also. For a 9x9 pan this will take about 10-15 minutes and for an 8x8 pan it will take 15-20 minutes.
Finished with powdered sugar
Single square
Once baked, let it cool on a wire rack if possible, a towel if not, for about 2 hours. You can leave the bars into the pan to keep or you can remove the foil, cut, and place on a plate. Dust with confectioners’ sugar before serving. You can save it at room temperature.


Until I bake next, I'm Sarah
Peace

Sunday, February 5, 2012

No Cupcake Pan? No Problem

So you want to make cupcakes because everyone else loves baking, decorating, and eating cupcakes. Right? So you go and reach for the cupcake pan – but you don’t have one. :( Here’s the solution. Just make this sheet cake, and follow along as I tell you a trick.


Just as a reminder as a few of the ingredients need to be either room temperature or softened; set out eggs for an hour for room temp and butter for an hour for softened (or 12 seconds in the microwave). For this recipe the butter needs to be really soft if you don't have a mixer (which I didn't). Also, if you don't want to buy a big bag of flour, they sell small bags too.

Chocolate ‘Cupcakes’ with Coffee Icing

Makes: ±20 cupcakes     Cake prep time: 35 min.     Bake time: 17-22 min.
Icing prep time: 25 min.       Assembly time: 30 min.     Total overall time: about 2 hours

Utensils needed: measuring cups and spoons, small, medium, and large bowls, spatula, whisk, jelly roll/sheet cake pan, butter knife, cup/rounded object, plastic bag, plates/containers


The Cake:
2 cups all-purpose flour                    12 T. unsalted butter, softened
¾ cup cocoa powder                         1 ¾ cups sugar
2 t. instant coffee                                 4 large eggs, room temp.
1 ½ t. baking soda                               2 t. vanilla extract
½ t. salt                                                   1 ½ cups whole milk, room temp.

Set the oven to 350 degrees and lightly butter or spray with vegetable oil a jelly roll pan. Whisk flour, cocoa powder, instant coffee, baking soda, and salt together in medium bowl and set aside.

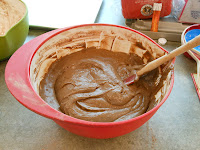
Completely mixed batter
Cut the butter into chunks and make sure it is very soft, if not microwave for a few seconds. Hand beat (using a whisk) the butter and sugar together in large bowl until light and fluffy for 3 minutes with a mixer or until well mixed if by hand. If you get the butter coated in sugar it is easier to beat without getting the whisk clogged up. Beat in the eggs, one at a time, until well mixed. Then beat in the vanilla.

Throughout the recipe, periodically scrape down the sides of the bowl and clean out the inside of the whisk.
Slowly beat in 1/3 of the flour mixture and follow with ½ of milk. Mix in ½ of the remaining flour mixture, beat in remaining milk, and finally mix remaining flour mixture.
Finished cake, cooling

Using the spatula mix the batter to make sure all is mixed in completely. Pour the batter into the jelly roll plan and evenly smooth. Bake until a toothpick to the center comes out clean, that is with no batter clinging to the toothpick; 17-22 minutes. 19 minutes was perfect for me.

Cool for 1 hour, or until pan is no longer warm.


The Icing:
2 T. heavy cream                               pinch of salt
1 t. vanilla extract                              2 ½ sticks of butter, softened
4 t. instant coffee                               2 ½ cups confectioners’ sugar

See the peak it holds
Stir the cream, vanilla, instant coffee, and salt together in small bowl until coffee and salt dissolves; the coffee might not dissolve right away but give it a minute and it will. In a large bowl, hand beat the soft butter with a whisk for 2 minutes until smooth, or if you have an electric mixer on medium-high speed for 30-60 seconds. While stirring (if you can), or with the mixer on medium-low, slowly add ½ cup of the confectioners’ sugar and partially mix, then slowly add in 1 cup of sugar to mix completely. Slowly add the last cup and beat until smooth. Stir the cream mixture and then slowly beat into the butter/sugar mixture. Quickly beat until the frosting holds a peak. If you want a thicker frosting add a touch more sugar, and if you want a thinner frosting add a touch more cream – remember, a little goes a long way in frosting. Chill in the refrigerator for 10 minutes.


The Assembly:
Now that the cake is cooled and the icing is made, let’s get everything ready. Get out either, parchment paper, paper towels, plates – something to set cut cake onto. Make either 1 sheet or have 2 plates; on to prep on and the other to keep it in. Take a cup or round object that is about the size of cupcake that you want and clean the edge of it; my cup had a 2” diameter and worked really well. Warning: there will be crumbs and leftover scraps. :)

Now set the edge of the lip to the corner of the cake (we want to get the most out of the cake, try to leave no gaps) and press down hard enough to make an impression. Follow the lines with the knife by making small up and down cuts. Pop the cake out by sliding the knife underneath. The first is a little difficult but it’s simple once you get the hang of it.
Press down
See the impression
Pop cake out
Cut the edge
I won’t tell you how to fail, but my original idea was an epic fail, I just had to let you know that there was trial and error at work here.

Get out a plastic bag and fill it with the icing. Cut the corner tip to create a piping bag. You can do the icing without a bag but it is so much easier with a bag. This frosting likes to separate (the butter from the other ingredients) in the bag so cut all the cakes out and then ice all at once with dolloping motions. Put on as much as you want.

This is a great idea to do with friends, it would probably be quicker; I did it all by myself and so the assembly took a little bit of time. And for a fun touch, place the 'cupcakes' in normal cupcake liners to take to parties and such.
Extra cake

When you can get to a point where you want to stop cutting out circles but have extra cake, cut the scraps from the clean side and do with the scraps as you please. Then put the remaining frosting on top and spread out for an even layer.

Finished 'cupcakes'


And there you go, 'cupcakes' without a cupcake pan. Please comment if you have a recipe that you want me to try or a problem you have that you need help with.


Until I bake next, I'm Sarah
Peace

Friday, February 3, 2012

The Work Space

This is my kitchen:


...actually it's the dorm's kitchen that I get to use, but for all purposes it's mine :)


Now time for the equipment/utensils list of things I have:

As mentioned in my last post I have a jelly roll pan and a cookie sheet. I have no other pan or pots (hopefully I won't need them, if not, that's what I'm supposed to figure out!)
I have 3 different sized bowls
I have a whisk, red spatula, and Darth Vader spatula (don't worry, all baked items are from the dark side, dark chocolate that is)
I have 4 measuring cups and some measuring spoons 
I have a cutting board and a small knife. Can I include my can opener too? And...that's it...


Oh gosh I really don't have a lot of supplies...I don't even have a hand mixer (uh oh, I guess I'll be working on my arm muscles this spring) Well I do have an oven mitt and a Washburn Ichabods apron, so I guess that's all I need :) If I ask my sister nicely enough she might even let me use her apartment kitchen (she has more supplies than I do...)


I promise that the next time I post it'll be baking. Hint: chocolate and coffee. ;D


Until I actually bake, I'm Sarah
Peace