Sunday, April 29, 2012

Freeze and Bake Chocolate Chip Cookies

The problem with wanting a few cookies is that you'll have to bake 2 dozen in the process. However, if you make the dough and then freeze it, you can bake as many as you want when you want to have the cookies. All you have to do is add some time in the oven to compensate. You don't have to use the recipe I use below, it should work with any basic cookie, like sugar, peanut butter, and such.


Freeze and Bake Chocolate Chip Cookies

Small and large bowl, measuring cups and spoons, whisk, spatula, cookie pan, plate, plastic bags, flat spatula

2 1⁄2 cups all-purpose flour                          1⁄2 cup granulated sugar
3⁄4 tsp. baking soda                                          2 eggs
3⁄4 tsp. salt                                                           2 tsp. vanilla extract
20 Tbs. unsalted butter, melted                 12 oz. semi-sweet chocolate chips
1 cup firmly packed light brown sugar

Mix together the flour, baking soda and salt in a small bowl. Set aside. In a large bowl, whisk together the butter, brown sugar, and granulated sugar until combined. Add the eggs one at a time, beating well after each addition, then beat in the vanilla.

Gradually add the flour mixture and whisk until just combined. Using a spatula, fold in the chocolate chips.

Drop the dough by rounded tablespoonfuls onto a cookie pan or plate and put into the freezer for about 30 minutes. Once the drops are frozen, place into a bag to store. This recipe makes a lot, so the bag should last a while if you allow it.

When you’re ready to bake the cookies, preheat the oven to 350 and place the frozen cookies onto a cookie sheet. Bake until golden brown, 15-20 minutes.

Until I bake next, I'm Sarah
Peace

Thursday, April 26, 2012

Basic Baking Problems Podcast

I interviewed my mother and sister on simple problems that they've had before in baking. Mary is a dentist in Kansas but always bakes. In her first apartment she had one of the smallest kitchens there is. Katie is a college student, also in Kansas, and though her kitchen is bigger than my mom's first kitchen, it could use some more counter space.


Podcast Powered By Podbean


I want to mention that when we talked about high elevation, the area we have baked in was around 8,600 feet above sea level. If you have any questions to the answers, just leave a comment and I’ll try to respond to them. Baking in all sorts of places is possible, just don’t give up.

Until I bake next, I'm Sarah
Peace


Here is a transcribed copy of the interview. I know it's hard to understand my family at times, so here it is written down. :)

Tuesday, April 24, 2012

Really Chocolatey Pie

Now this pie isn't for the week of heart. My mother loves chocolate and so my father and I created this pie. It's simple to make, store, and serve but its rich because of all the chocolate.

Take a store bought pie crust, preferably an Oreo or chocolate one, and put a layer of chocolate frosting. Then sprinkle broken candy as a layer, we chose kit kats. Put another layer of chocolate frosting. Then top with a layer of whip cream and the option to sprinkle more candy pieces. Store in the freezer.

Until I bake next, I'm Sarah
Peace

Thursday, April 19, 2012

Panless Tart

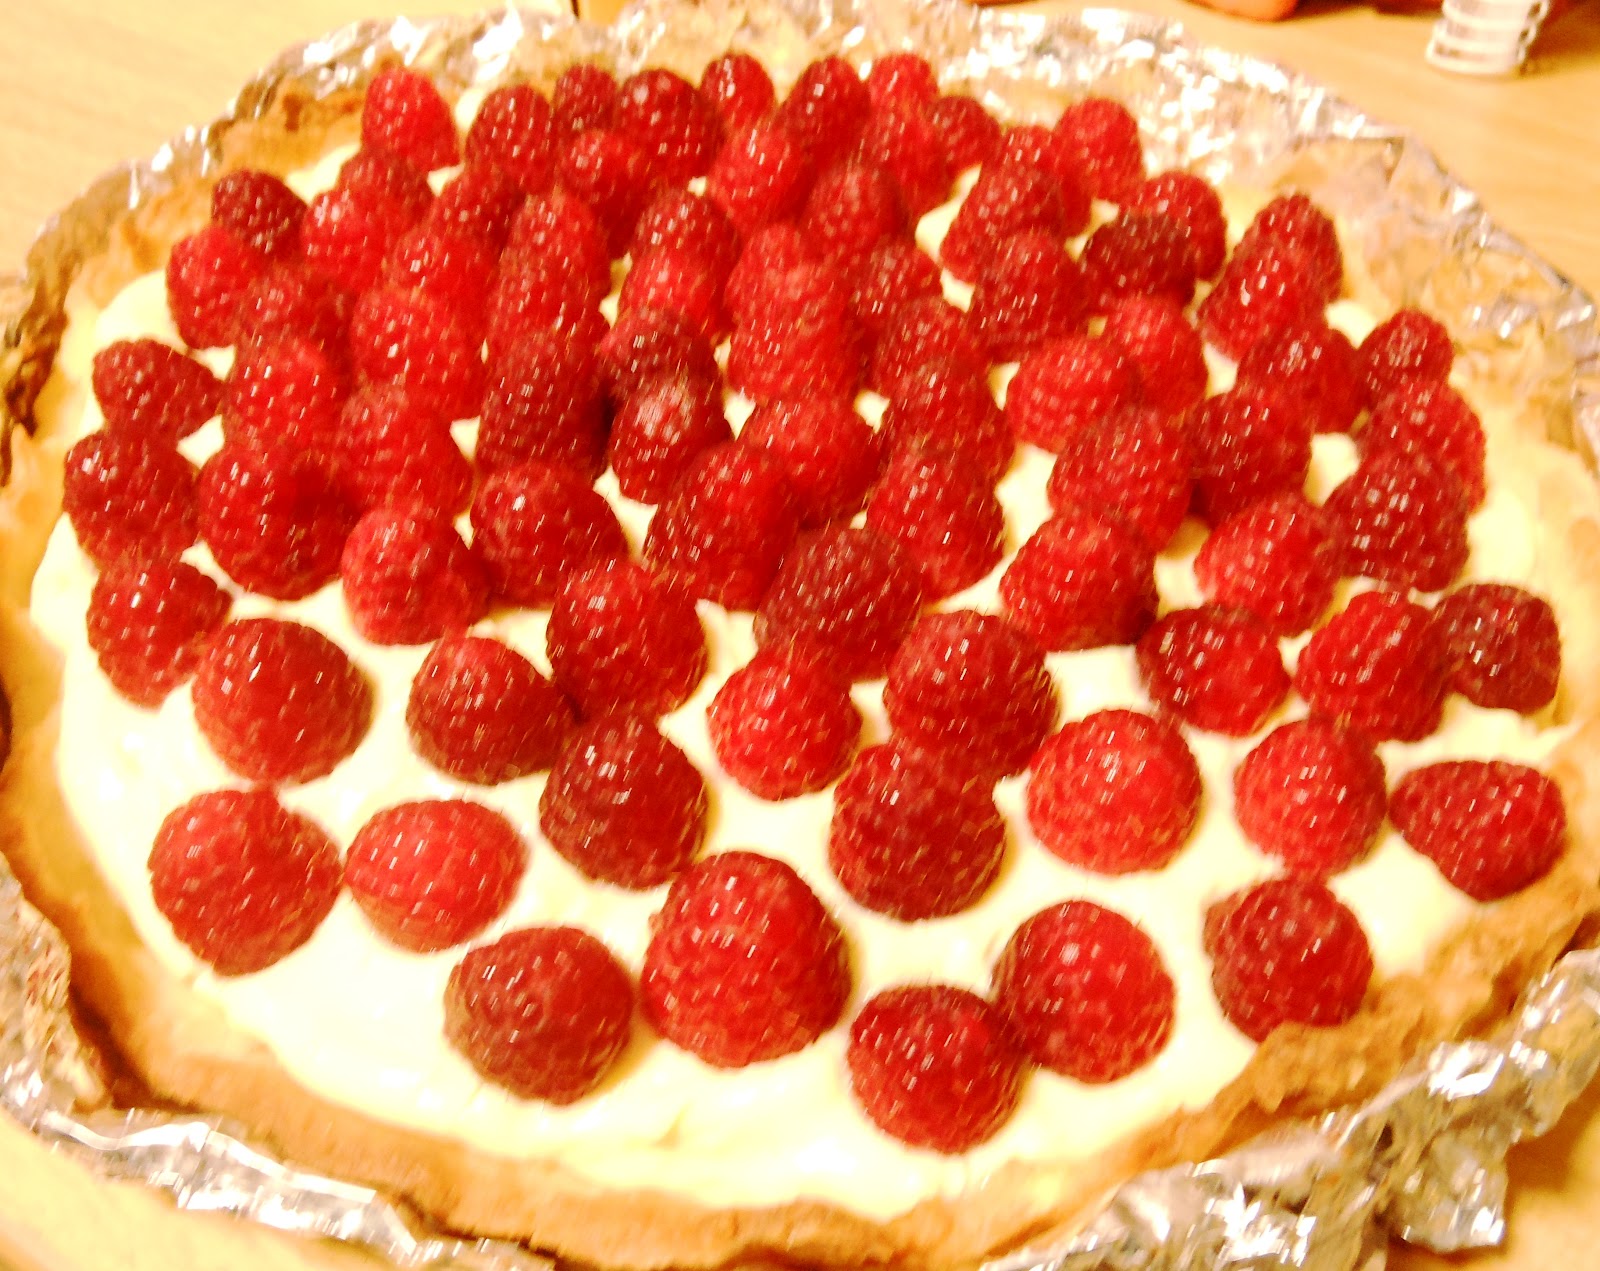
I don't have a tart pan, mini tart pan, or even a cupcake pan as previously established. But I want to make a raspberry tart. The presentation isn't whats key to me - flavor is key. I've read that you can use a spring form pan (used for cheesecakes) or even pie pans, but I have neither. The only dish I have with sides is a Le Creuset baking dish that holds about 16 oz (aka, it's not big).


Finished tart
Solution: Most tart pans are 9-11 inches wide and about an inch think. Get basic foil paper, find a round object (like a plate) within those inches and put the object in the middle of the foil. Leave room to fold and scrunch but keep the bottom flat. Try not to poke any holes through. Once the round bottom is formed, fold the foil to create an edge. You can get creative and do a zigzag design that most tart pans have or just keep it a simple flat edge.


Fresh Fruit Pan-less Tart


Utensils needed: small, medium, and large bowls, measuring cups and spoons, whisk, large fork, plastic wrap/bag, knife, small/medium saucepan, spatula

Crust:
1 egg yolk                                               2/3 c. powdered sugar
1 T. heavy cream                                 ¼ t. salt
½ t. vanilla extract                            8 T. (1 stick) unsalted butter, cut into pieces
1 ¼ c. all-purpose flour


Separate the egg yolk and whisk in a small bowl yolk, cream, and vanilla then set aside. In a large bowl, mix flour, sugar, and salt until combined. Scatter cold butter pieces over the top of the flour mixture and using a large fork, cut and mix the butter until the mixture resembles coarse cornmeal; around 5 minutes. Add half of the egg mixture and partially mix with fork, then add the second half and mix completely. The dough should start to clump and stick together. Place the dough in plastic wrap or a plastic bag and press into a flat 6-inch disk-like shape. Refrigerate for at least 1 hour.


While letting the chilled dough soften slightly at room temperature, time to make part of the pan. Get out some aluminum foil and rip out two equal sheets just over a foot long. Place a plate about 9-inches in diameter in the middle and place something heavy on top. Create a definite flat, round bottom and then fold the extra upwards. Fold the edges backwards in half to create a firm edge, about an inch high. Remove the plate and fold the extra edges in. For a more decorative look, crimp the edges to make a zigzag edge.


On a lightly floured surface, roll out the dough until it is able to cover the bottom of the foil and over an inch in extra. Try to get an even width. Carefully fold the dough in half and then half again into a triangle. Place the tip in the center and unfold. Place the plate on top of the dough and slightly press down to get a slight impression. Trim the edges of the crust by cutting/snipping any dough past the foil edge. Freeze for 30 minutes.

Adjust the oven rack to the middle and heat the oven to 350 degrees, if you actually have a tart pan go up to 375. Set the tart pan on a baking sheet. Take a sheet of foil and place over the tart dough and over the edges. Fill the pan with baking weights or coins. Bake for 15 minutes, rotate, and bake for another 15 minutes. Carefully remove the weights and foil by peeling the corners of the top foil into a pouch. After a few seconds, the foil will actually cool off to touch. Continue baking until the crust is a deep golden brown, 5-10 minutes. Transfer to a wire rack or cool towel to cool completely.


Filling:
2 c. half-and-half                               3 T. cornstarch
½ c. granulated sugar                     4 T. unsalted butter, cut into pieces
Pinch of salt                                        1 ½ t. vanilla extract
5 egg yolks


In a separate medium bowl, whisk the separated egg yolks, cornstarch, and remaining 2 T. of sugar together until smooth. In a medium saucepan over medium-high heat, bring the half-and-half, 6 T. of sugar, and salt to a simmer (little bubbles on the edge and steaming) stirring with a spatula occasionally.
Simmering half&half mixture
Yolk mixture
Turn off heat and slowly whisk about 1 cup of the hot half-and-half into the yolks. Put the half-and-half mixture back on medium heat. Then slowly whisk in the yolks back into the simmering half-and-half mixture. Whisking constantly, return the mixture to a simmer and cook until thickened and a few bubbles burst on the surface, about 30 seconds, this is very quick. Remove from heat, whisk in the butter and vanilla.
Thickened mixture
Butter and vanilla added
Lay a sheet of plastic wrap flush to surface of the cream but away from the sides of the pot until cool enough to not melt the plastic. Refrigerate until cold, about 3 hours. The plastic prevents a skin from forming.


Once everything is cooled, whisk the pastry cream and then spread it over the bottom of the baked and cooled tart crust. When about to serve, place cleaned fruit on top. I used raspberries but you can use strawberries, blueberries, blackberries, kiwi – think of it as a classy fruit pizza. Cover with plastic wrap and keep refrigerated.

Covered tart
Add fruit in any design


I didn't keep track of time this recipe, but I got everything (from the dough to the decorating) done in one day.


Until I bake next, 
I'm Sarah
Peace

Sunday, April 1, 2012

Sugar Cookies

At home there's a good chance that there are some cookie cutters lying about. My home always had buckets of different shapes. But here at college - I have zero cutters. I'm also a college student which makes finding the time and money to go out and by cutters limited. Here comes household cookie cutters! There are cups, using a knife to cut shapes, and random cookie cutters you might actually have (I have a cutter of my school mascot for some reason).

Another problem with sugar cookies is that you have roll out the dough and in small spaces that can be hard. The first way to help with that is cut in smaller batches; cut the ball of dough into small chunks.

Sugar Cookies


Makes: ±2 dozen     Cookie prep time: 15 min    Fridge time: 6-8 hours    Bake time: 1 hour   Icing prep and assembly time: 1 hour

Utensils needed: measuring cups and spoons, spatula, whisk, large & small mixing bowls, plastic wrap, flat spatula, small dish, cookie sheet, container, 4 spoon, 2 small bowls, 4 sandwich size plastic bags

The Cookie:

1 c. butter, softened (2 sticks)         1/2 t. almond extract
1 c. granulated sugar                           2 1/4 c. all-purpose flour

2 eggs                                                         1 1/2 t. baking powder
1 t. vanilla extract


In a large bowl, using a whisk cream butter and sugar until grainy-smooth, 2-4 minutes. If not using a mixer, cut butter into smaller pieces to mix and use a knife to help declump the whisk. Whisk in eggs and extracts until fluffy, 3 solid minutes. In a separate small bowl, combine flour and baking powder with a spatula. Stir flour mixture in creamed mixture and combine well. Using the spatula, form the dough into a ball and place on a square of plastic wrap to wrap tightly or a plastic bag with the air removed and refrigerate for 6-8 hours or overnight.


After the refrigerated time, preheat the oven to 375 degrees and have the racks at a normal medium height. Cut off a 1/3 of the dough and put the rest back in the fridge. On a well floured surface with a floured rolling pin, roll out a section of the dough to 1/4-inch thick. If you don't trust the cleanliness of your table like me, lightly flour another pan. If you also don't have a rolling pin like I do, use a smooth round object like a can, water bottle, and the longer the object the better. I have a jar of peanut butter to use.


Flour your hands well as this is a sticky dough but with flour it gets better. Work the dough with your hands a little and start flattening the dough with your hands. Flatten your dough and flip it over, reflouring the pan/table if necessary. Flip and roll until until the dough doesn't stick anymore and is 1/4-inch thick.


Get a small flat dish like a plate and put flour in it, this will be to dip the edges of your cutters and cups into so they don't stick. Cut out cookies using cups (an elongated cup can be an oval), cutters, or knifing a shape and transfer using a flat spatula to the cookie sheet (spray or butter if not non-stick). Smash and reroll the dough after you get as many cookies as you can out. If the dough becomes too sticky to work with but back in the fridge and get another section. The very last scrapes of the dough I always smash together and either mold into random shapes or eat it (which isn't good because of the raw eggs...)


Bake 8-12 minutes or until edges are lightly golden brown. Using the flat spatula remove done cookies to another pan or a wire rack to cool for 30 min to an hour. If your oven is browning the cookies too quickly, lower the temp to 350 and increase the time. If you only have one cookie sheet like me then lay a cool damp washcloth under the cookie sheet to help it cool off quickly.

The Icing/Assembly:

2 tubs of store bought icing (preferably white so the color comes through)
food coloring


As the cookies are done and cooling, get two small bowls out and separate the icing into 4 equal shares. Then add food coloring. I'm made blue, red, green, and kept the last section white. Taking a plastic bag and using the spoon for that color, fill the bag but leave room at a corner. Then cut a small corner off, the diagonal line you've made should not be longer than 2 cm. The smaller the cut the thinner the icing will come out. Now you can decorate the cookies with lines, dots, zigzag, outlines - don't forget the sprinkles!


Until I bake next, I'm Sarah
Peace

Wednesday, March 28, 2012

Cupcake-in-a-Mug

You might have heard of these little things called 3-2-1 cupcakes and they are perfect if you don't have the space to make and keep a full cake. The recipe is simple and the directions are even easier.

All you need to do is get 1 angel food cake mix (the kind that only adds water) and 1 cake mix of any other flavor. Put inside a big plastic bag to mix together and store. I used a chocolate fudge cake mix.

In a microwave safe mug, add 3 T cake mix, 2 T water, and microwave 1 minute. Expect it to puff upwards.

Use a butter knife to scrap the edges and flip the mug upside down to pop it out. You can top the cake with icing, whipped cream, syrup - pretty much anything.


All mixed together

After 1 minute


Plus store bought icing
Until I bake next, I'm Sarah
Peace

Tuesday, February 28, 2012

Cinnamon Filled Pastry Made Simple

Pastry. It can be a scary word for one with a small and limited kitchen, but it isn't always scary. This recipe is simple and partially store bought (I don't like using store bought things a lot, but this stuff is good). As a side note, you can use these puff pastry sheets for savory dishes as well as deserts.

need: cookie sheet, knife, fork, spoon, flat spatula, whisk, measuring spoon, 2 small bowls

Cinnamon-Sugar Filled Pastry with Glaze

1 box Pepperidge Farm Puff Pastry Sheets (1 box has 2 sheets)
3 T. cinnamon
6 T. granulated sugar
4 T. and some extra butter

Follow the instructions on the package to let the sheets defrost; either 40 minutes at room temperature or overnight in the fridge. In the meantime, make the filling and preheat the oven to 375 degrees. Melt the butter and whisk sugar and cinnamon into a thick coarse mixture. If you don’t have a whisk, use a fork.

Once the sheets are defrosted, completely separate the 3 sections. Since I'm at the dorms and don’t have a clean table, I'm going to use my extra pan. Following the preset lines, cut the square into 9 smaller squares. Do this for the other sheet. Take a small square and lightly use the palm of your hand to flatten it out. Adjust the square so it looks like a diamond (<>) and have the stickier side up.

Then take about a 3/4 teaspoon full of filling and dump it in the middle of the square. Lightly butter the bottom edges and take the top corner and fold it over the filling to place on top of the bottom corner but allow some of the bottom layer to show (basically not a perfect match). Use a fork to crimp the edges, press down hard enough to squish the top layer into the bottom layer but not enough to cut through.

To allow the pastries to come off the pan easier, rub some butter on the cookie sheet or use a nonstick cookie sheet pan. Place the triangles so they aren't touching; I suggest 4 or so triangles. Bake for 15-20 minutes or golden brown. They won't get that much wider but should puff up and the filling seep out of the edge. Watch out for burning or smoke from the filling that has seeped onto the pan. When you take out the pan, quickly take a damp paper towel to the filling by tapping the pastry away and swiping up the mess. Be careful with how you fold the paper towel as the filling is hot; I burned myself on the filling alone (ouch).

Be creative by twisting the corners up. Take the pastries off the pan onto a wire rack or a container for storage. By sliding the triangles flat side to flat side, it is easier to drizzle and not waste icing. The pastries are good as desert or as breakfast as they are similar to the ingredients in cinnamon rolls.

Icing


3/4 powdered sugar
1/2 tsp. vanilla
1 T. water


Whisk together all ingredients until thick but thin enough to drizzle. If too thin add more powdered sugar, a little at a time. If too thick to drizzle, add a small amount of water at a time. A little bit of water goes a long way.
Cinnamon-Sugar Filled Pastries